Here is an easy way to import Smart Lists in to Oracle PBCS or on premise Planning using a csv file.
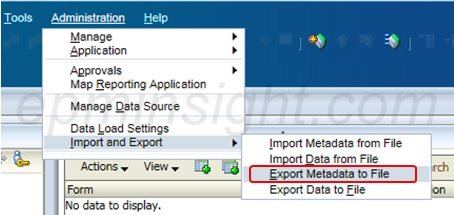
This has been tested on Oracle PBCS and Planning versions 11.1.2.3.500 and later. The first step would be to export the existing Smart Lists. When we do this we get the file format that we can modify and re-import. If you do not have any smart lists yet in your application, you can create a test smart list with one entry and then export the file. From within Workspace, navigate to Administration->Import and Export->Export Metadata to File.
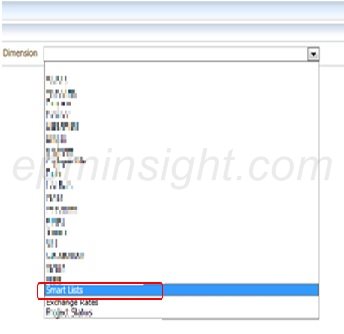
From the Dimension drop down, select Smart Lists and then click on ‘Run’
The system will generate a .csv file. Save the file and open it. If you had existing smart lists, you should see the smart list entries in the file. This should give you the idea of the format you will need to add data for new smart lists. Make a note of the field headers. If you did not have any existing smart lists, you can just create an empty csv file and start by adding the field names exactly as given below.
The ‘Operation’ field specifies two actions; ‘addsmartlist’ which denotes the name of the new smart list that you want to create/update and ‘addentry’ which is used to add entries in the smart list. Here I am creating a new smart list called ‘Product_Type’ and so the operation is ‘addsmartlist’. The remaining rows depict the smart list entries and hence the operation is ‘addentry’. Enter other details as required in the ‘Entry ID’, ‘Entry Name’ and ‘Entry Label’ fields.
Save the file after making the required updates and make sure you save the file as a .csv (the default selection is binary which cannot be imported back)
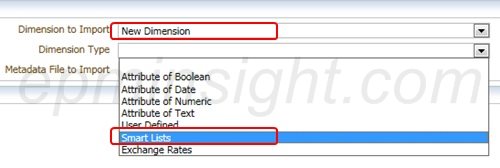
Once the file is saved, navigate to Administration->Import and Export->Import Metadata from File. From the ‘Dimension to Import’ select ‘New Dimension’. From the Dimension Type, select Smart Lists.
Next, select the file you created/updated in the previous step in the ‘Metadata File to Import’ section.
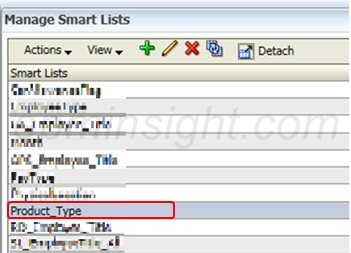
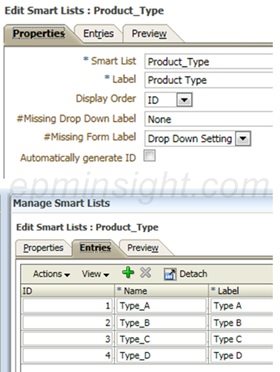
Click on Validate to ensure the file is contents are correct and once validated click on ‘Run’ to import the file. Correct errors if any. Once successfully loaded, navigate to Administration->Manage->Smart Lists. You should be able to see the new smart list that you created by uploading the file. In this example, you see the Product_Type smart list in the Smart Lists manager.
Edit the Smart List that you just created to verify the entries. In this example it is ‘Product_Type. You will see the entries that you uploaded using the CSV file.
You can use the same method to add to or update an existing Smart List easily.
A quick note of thanks to my colleague Sumit Deo for working with me on exploring this feature.

